
About 2 years ago, Ryan bought me an Instax Mini Camera and since then, I have been in love with it! Whenever we go sightseeing, take a trip somewhere, or even just head to the park for a picnic, I always have this camera with me. Needless to say, I have really accumulated quite a large stack of photos over the past couple of years!
Since I’ve had this camera, I’ve tried a few different methods for showcasing our photos and I haven’t really loved anything so far! Therefore, I have been searching (for what seems like forever) for a good way to display all of the photos I have taken with this camera. After all, they’re pretty dang cute and are great little memories of all the places we’ve been. After scouring Pinterest for multiple hours (no shame), I found a great DIY solution to my Polaroid picture dilemma. I feel like this project was such a Pinterest-Success, so I am super excited to share the process with you!

What you will need
- Branch
- Twine/rope/string…whatever you fancy
- Your polaroid photos (duh)
- Mini clothespins
- Hammer
- A few nails
Instructions
- First things first. Put on some sneaks and head out to your local forest in search of the perfect branch. Now, when I say “perfect”, I don’t mean the branch has to be perfectly straight or have absolutely zero flaws. Sometimes the funkiest-looking branches make for the best home decor. Okay…do you have your branch? Great, let’s move on!
- Now, this step is completely optional. But, you can choose to pick away the bark so it has a smoother look to it. Or, do what I did and just leave it exactly how you found it in the woods. Basically, use this time to do whatever you want to your branch. You do you, girl. Paint it, bedazzle it, throw some feathers up there…whatever makes you happy!

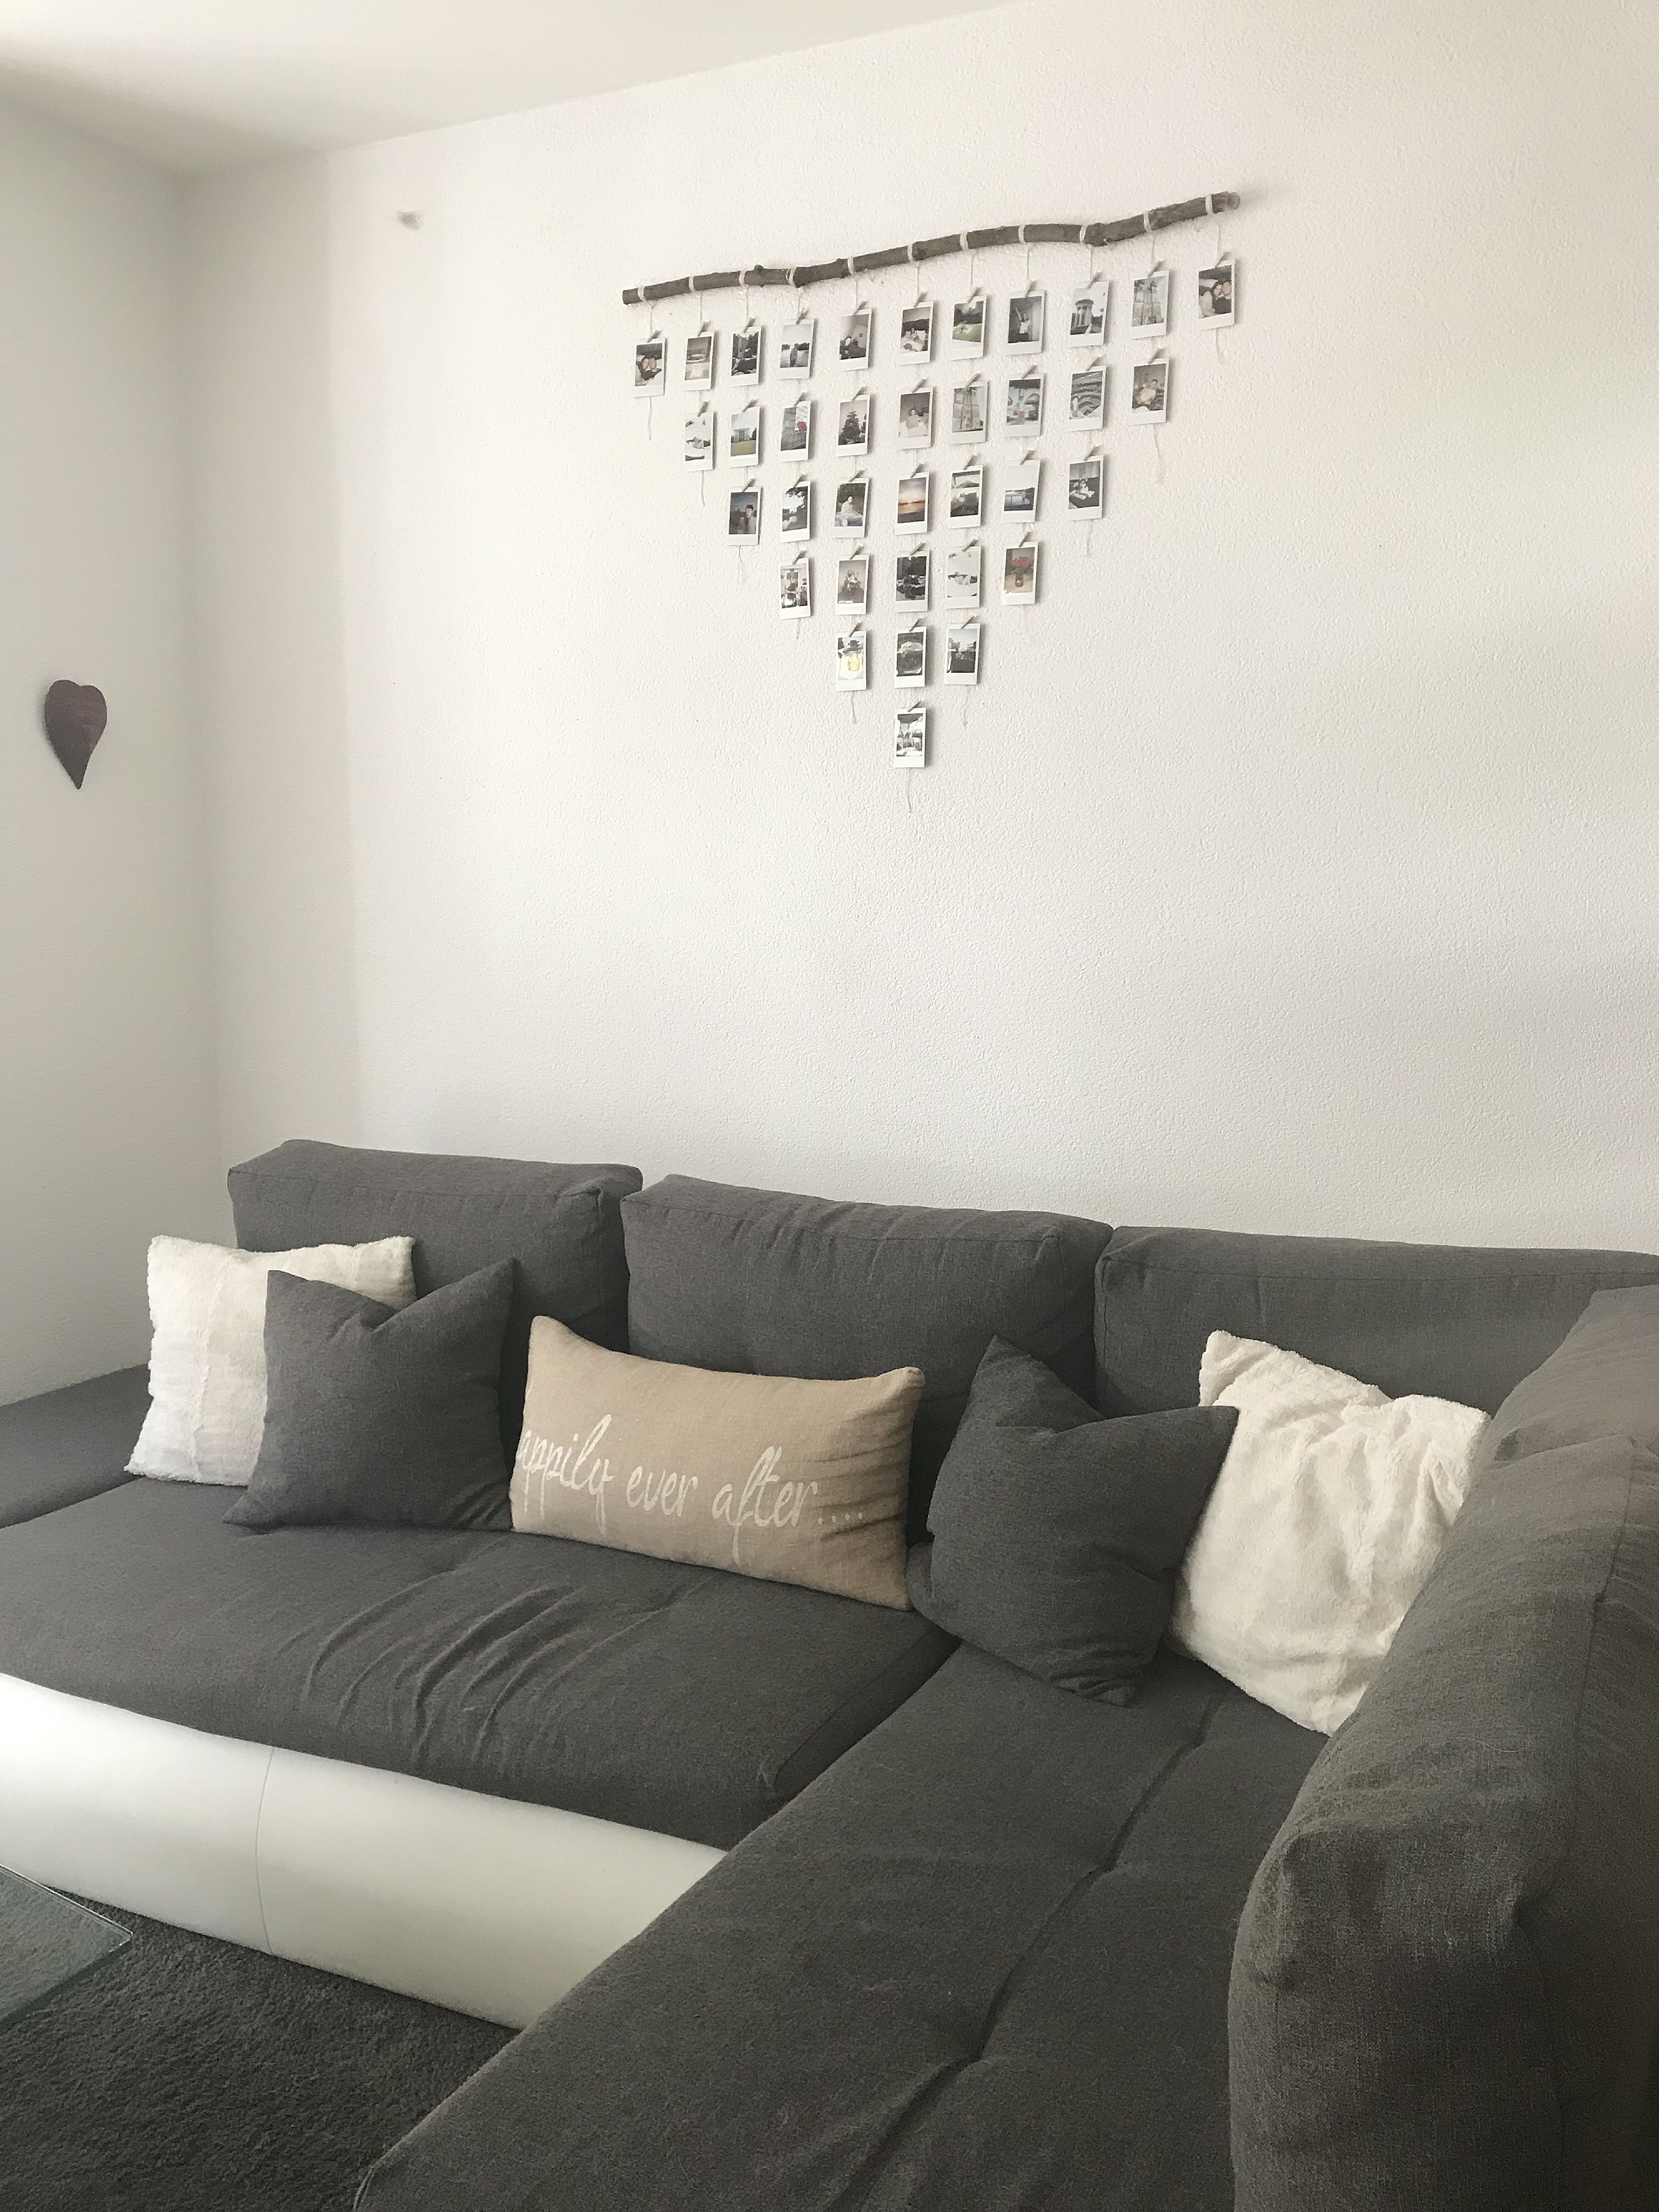
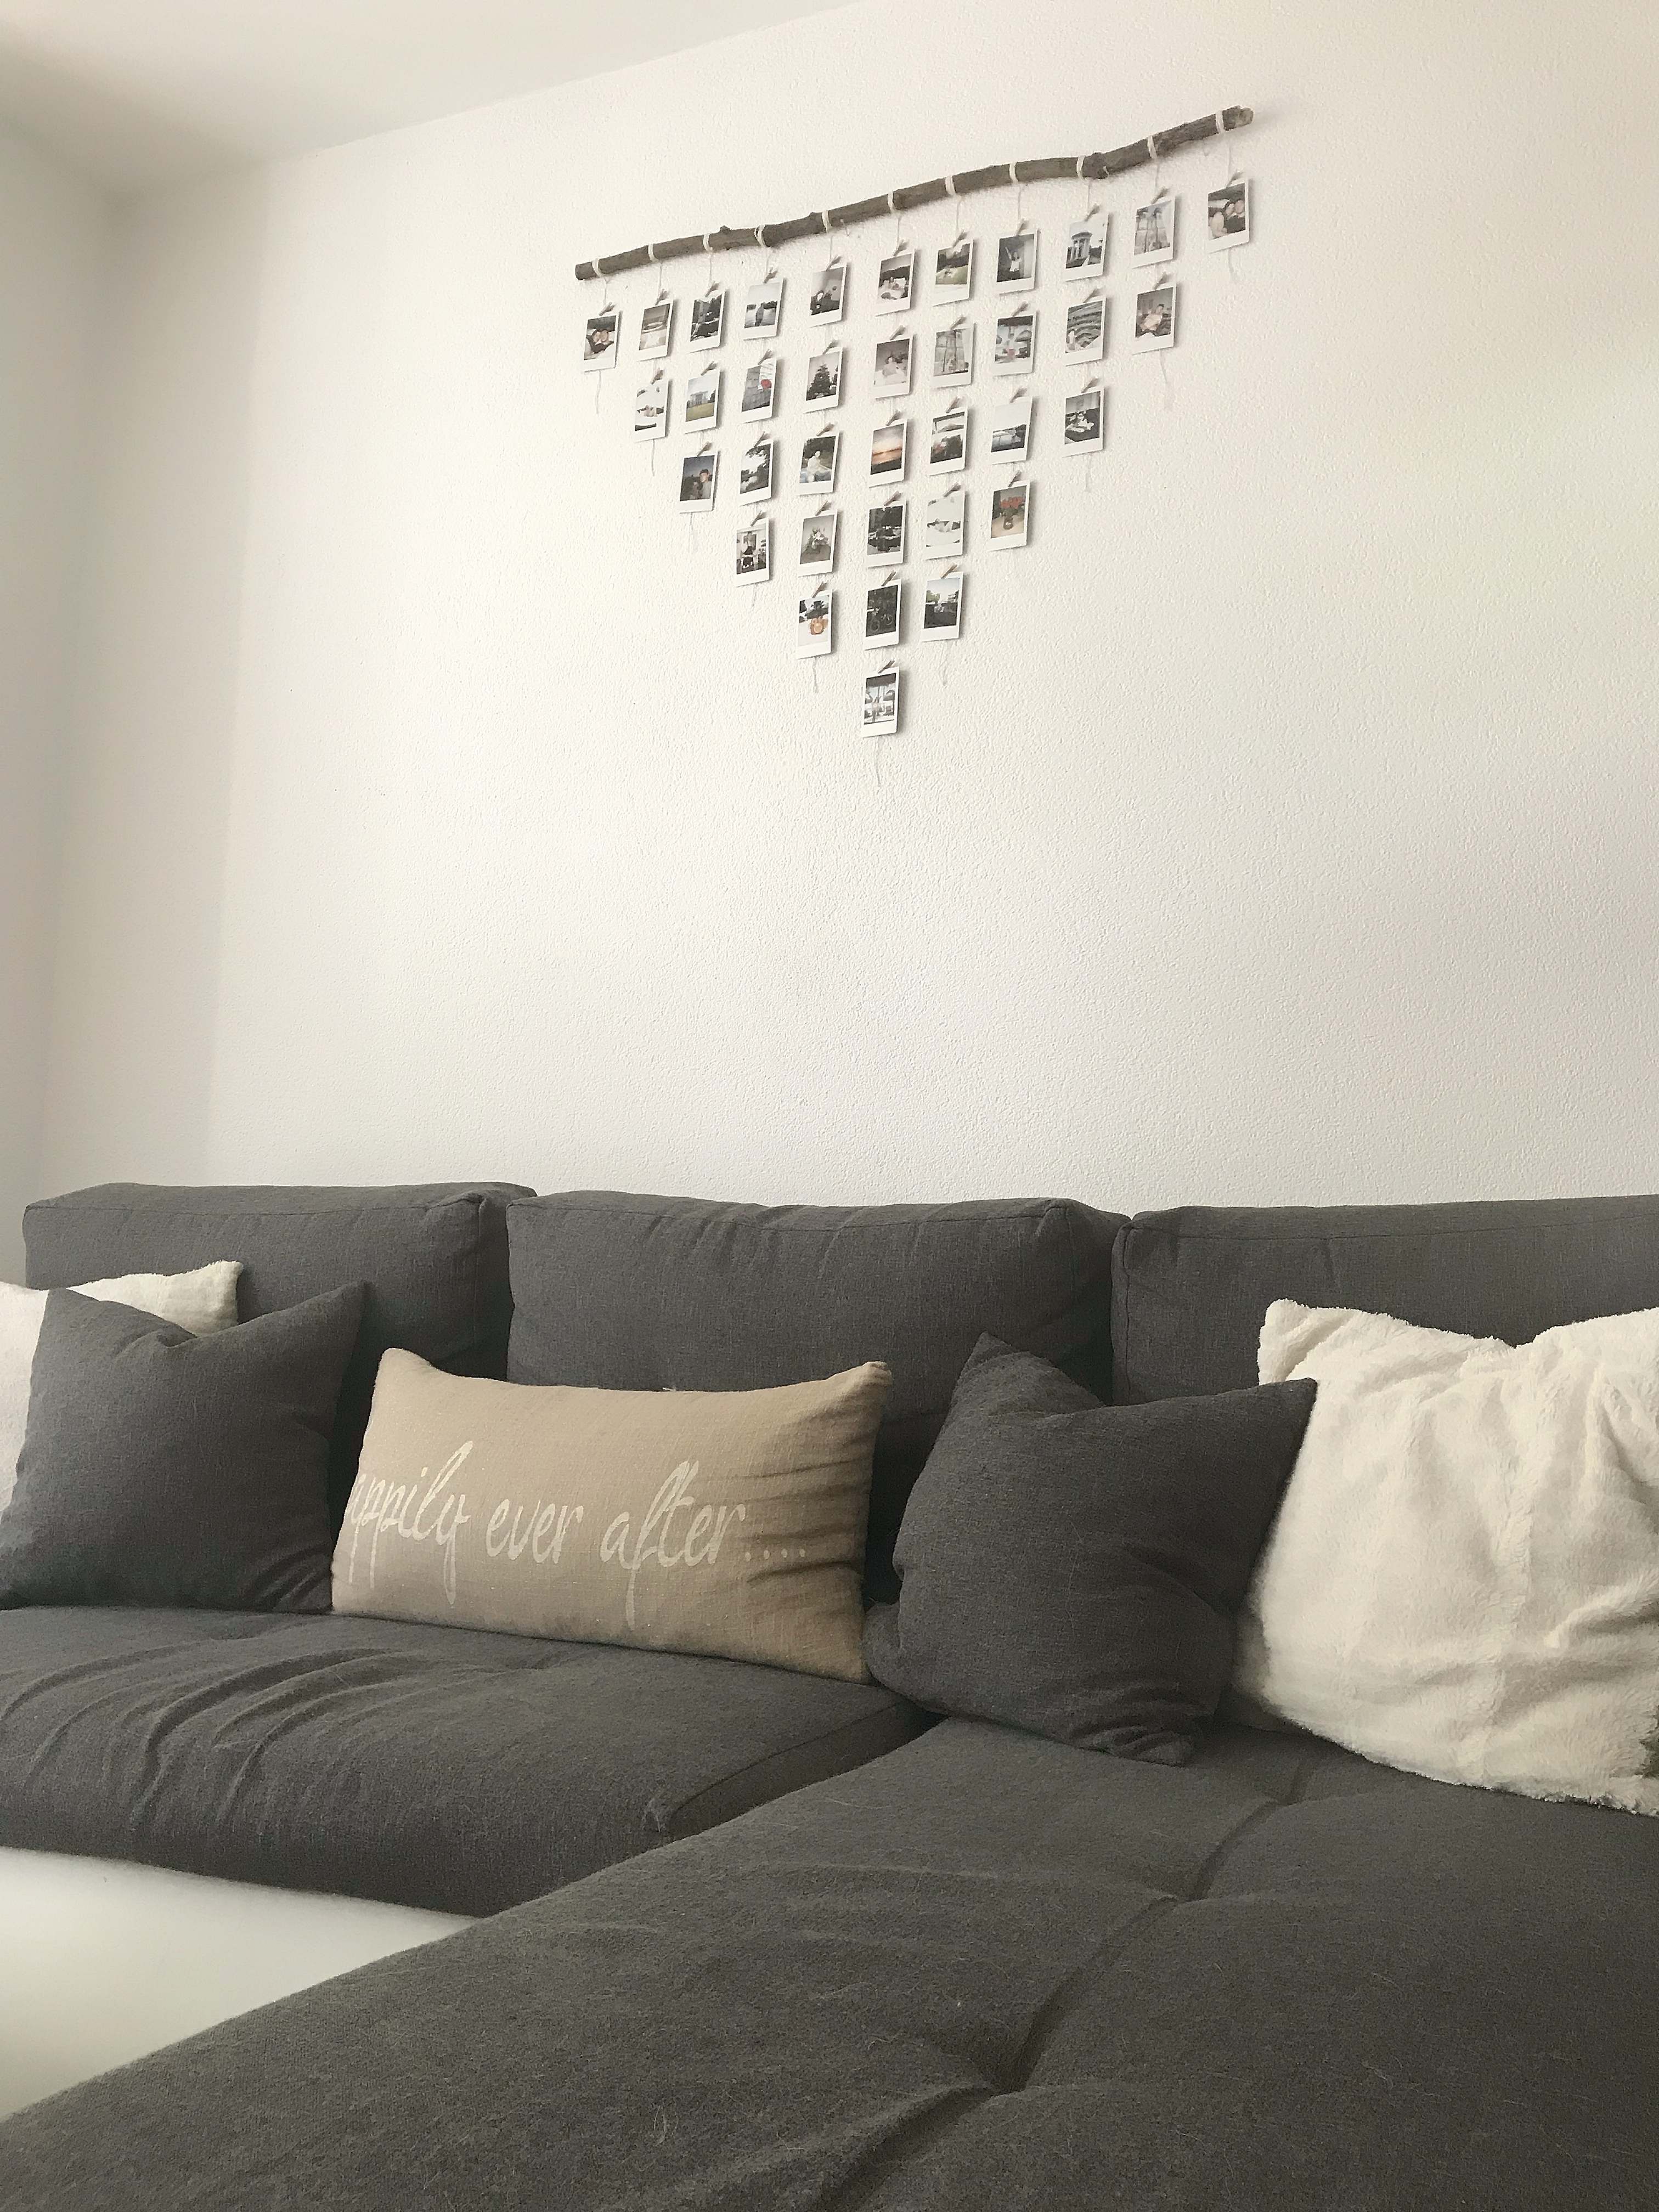
- Once you are 100% happy with the way your branch looks, it’s time to move onto the layout of the photos. You have to decide how many photos you want to display and how you want the layout to look. Do you want to keep things clean and simple and create 5 columns of 5 photos? Or would you prefer something a bit more creative or random? Personally, I chose to make one large triangle shape with my photos!
- Now that you have your photos picked out and the layout of your design in mind, I recommend starting with securing your string pieces to the branch. Because you already know what design you are going to create with your photos, you should know how many columns you will ultimately have. Evenly measure out the spaces on your branch, and begin attaching your lines of string. Make sure you leave each piece long to start in order to ensure you have enough length- you can always go back and cut them shorter later. I chose to wrap and tie the string around the branch multiple times to add a bit more pizazz to it.
- By now you should have all of your string pieces tied and hanging from the branch. You with me? Next comes hanging your branch on the wall. There are obviously many different directions you could go when hanging your branch. I chose to keep things simple-stupid and hammer in a few nails (after measuring of course) for the branch to sit on- one on each end and one in the middle.
- Once your branch is hanging properly on the wall, it is time for the best part…hanging your photos! All you have to do is grab one clothespin per one photo and begin clipping them on! If you want to be a professional, you could totally measure out the spaces and make sure each photo is perfectly aligned. Me? I just eyeballed it and I think it still came out pretty darn good!
- Finally, take a step back to oooo and ahhhh at your final masterpiece!


And…there you have it! Easy right? And look how cute the final product is! This project took me just one afternoon to complete and cost me virtually no money. Plus, it is a great way to decorate and make your house feel a bit more “home-y” if you are living the temporary-home-life like us!
Do you have a Polaroid or Instax camera? I would love to hear how you showcase all of your photos!


